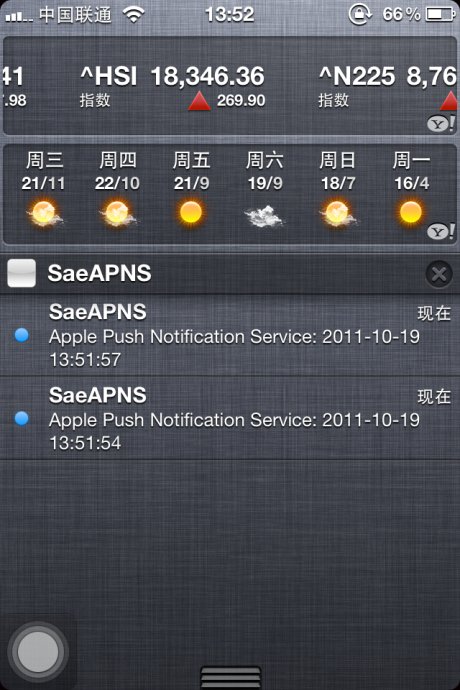
在SAE使用Apple Push Notification Service服务开发iOS应用, 实现消息推送
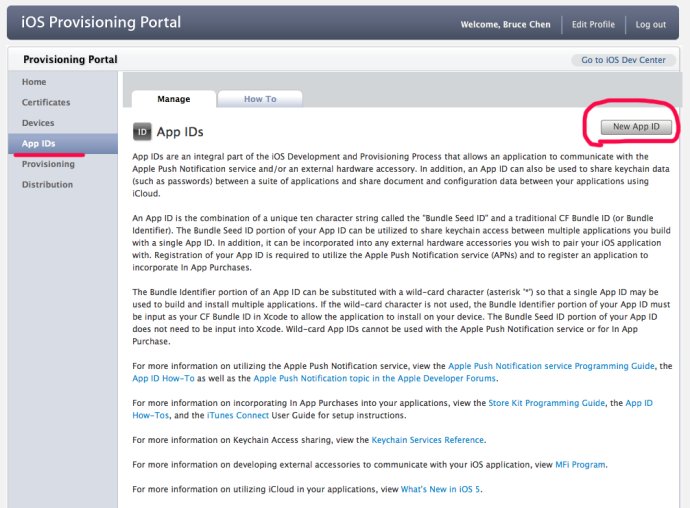
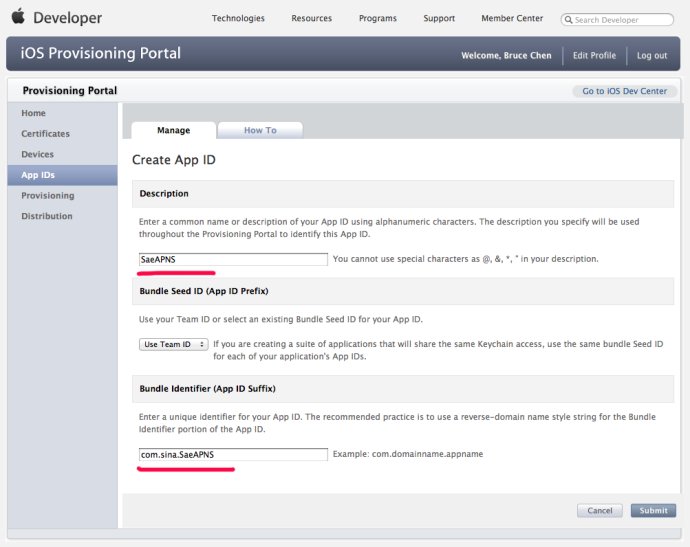
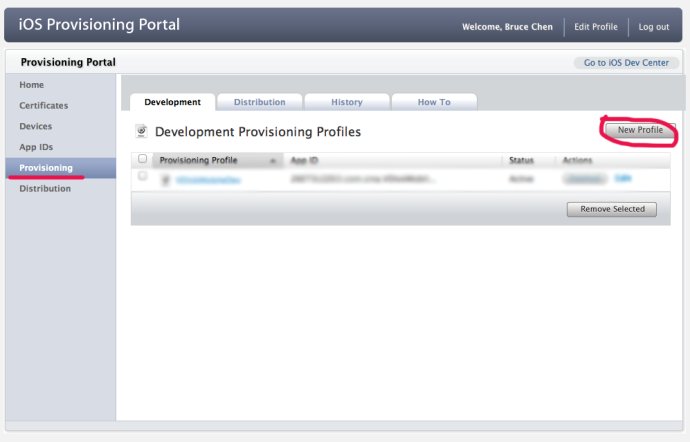
1,在iOS开发者中心: iOS Provisioning Portal 创建一个AppID,如图:
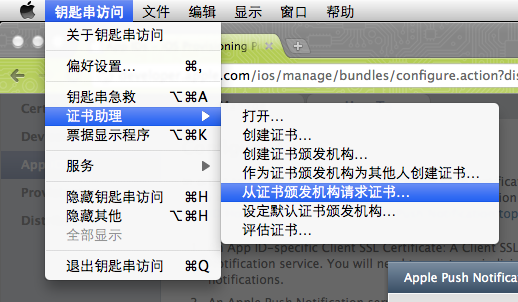
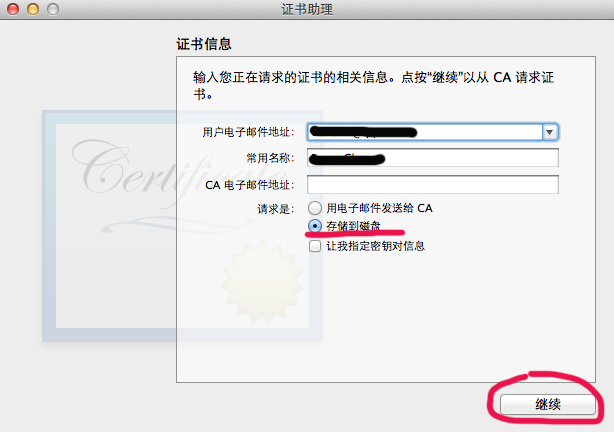
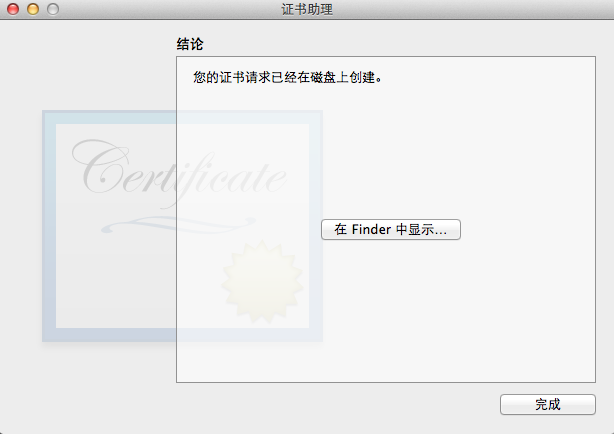
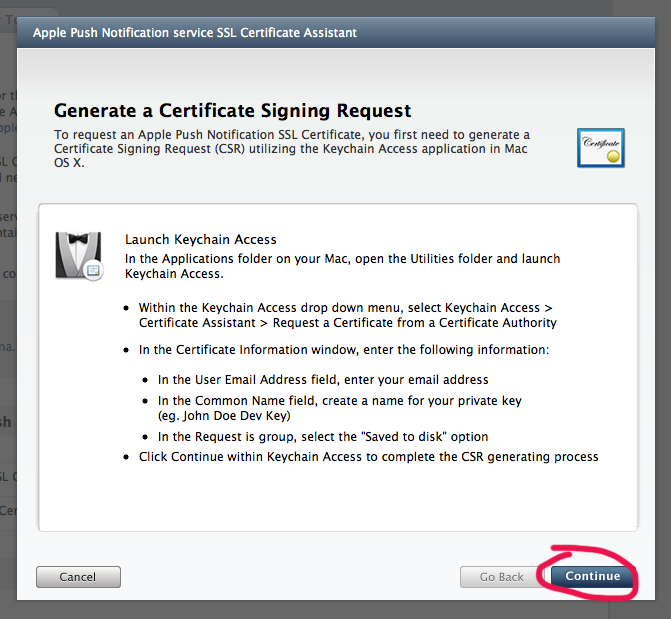
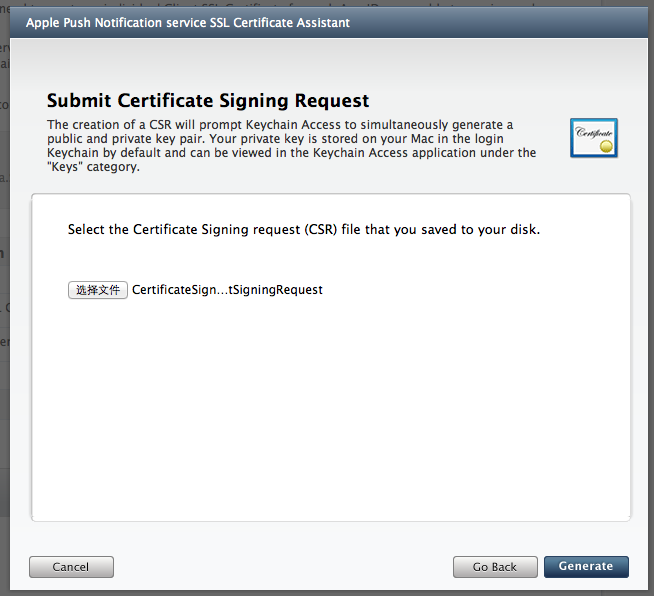
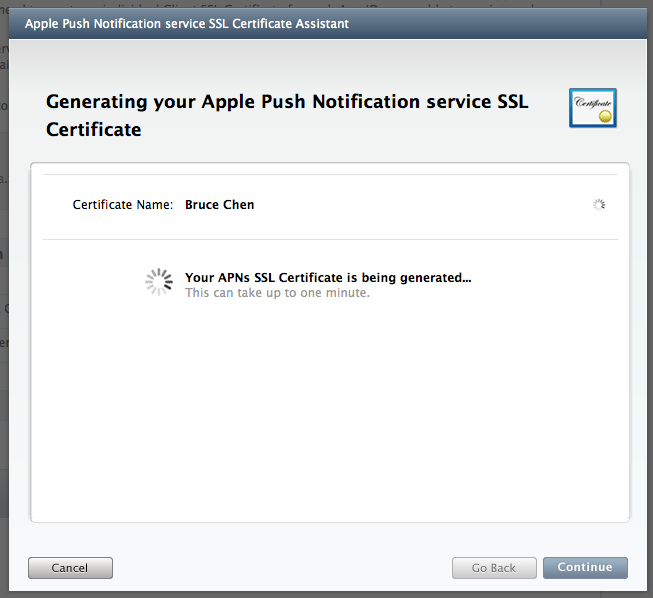
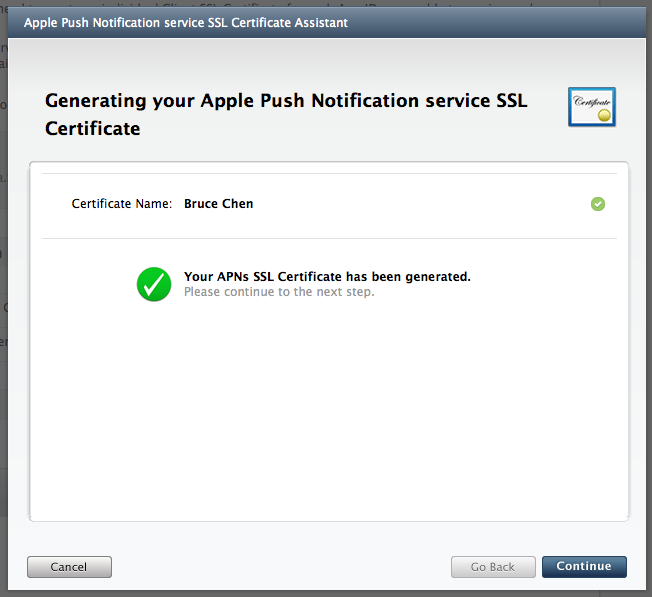
2,生成iOS Push Service证书,如图:


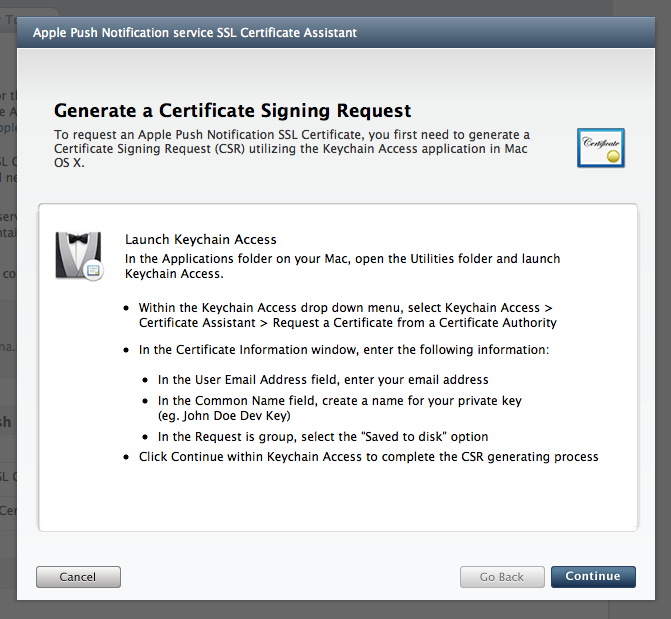
按照上述提示操作:

回到iOS Provisioning Portal:
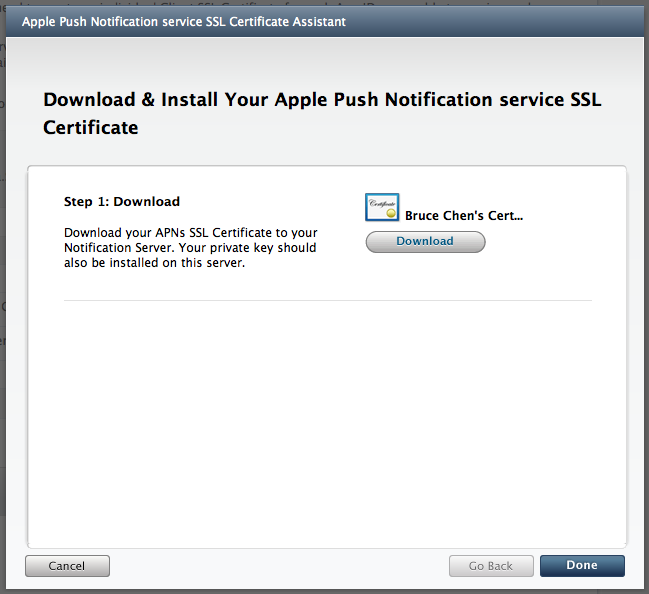
点击“Download”下载iOS Push Service证书文件,如图:
3,导入证书文件到keychain:双击即可
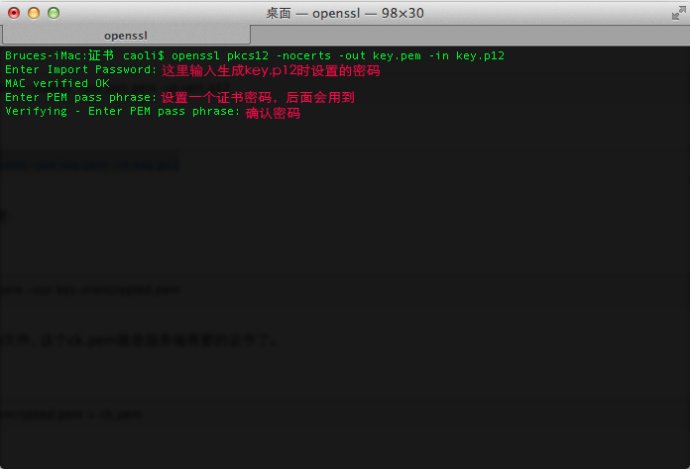
4,生成ck.pem
导出cert.p12:
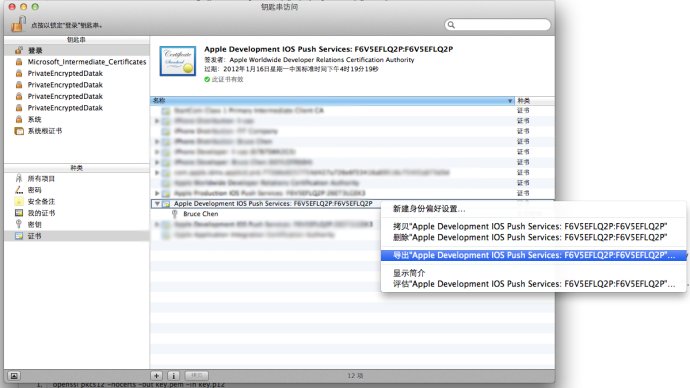

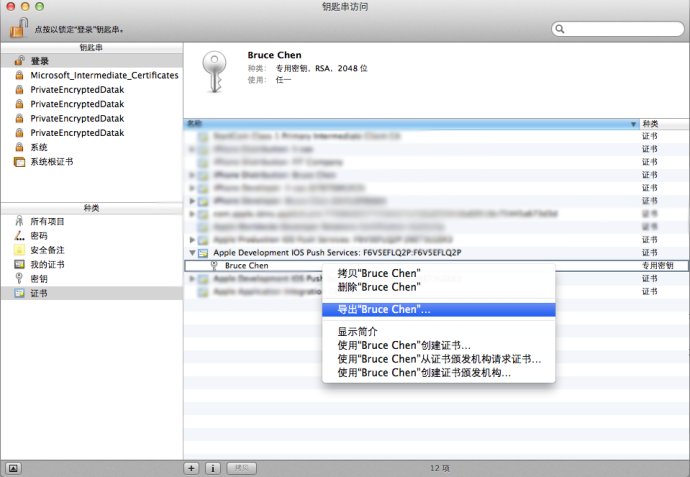
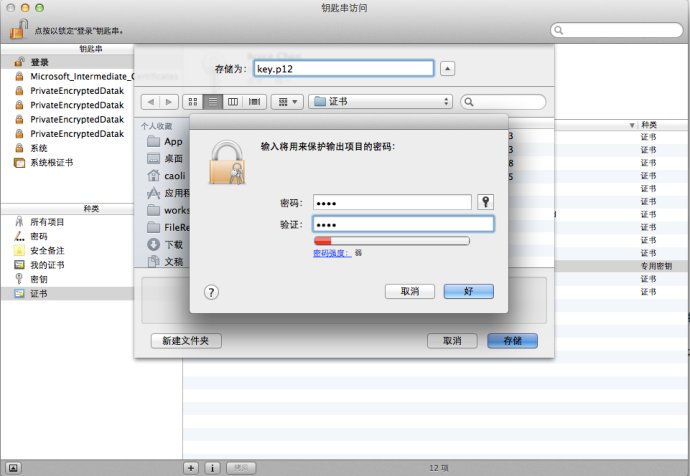
导出key.p12:
得到这样两个文件:
接下来打开终端:
输入命令:openssl pkcs12 -clcerts -nokeys -out cert.pem -in cert.p12

然后输入命令:openssl pkcs12 -nocerts -out key.pem -in key.p12
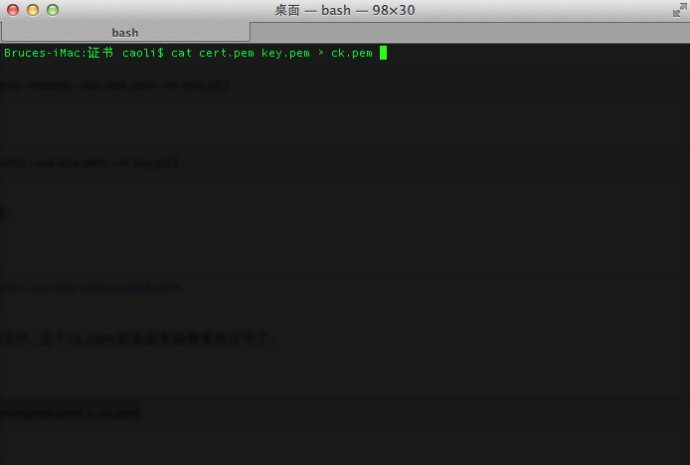
最后合并成一个ck.pem文件:
输入命令:cat cert.pem key.pem > ck.pem
得到一个ck.pem文件:
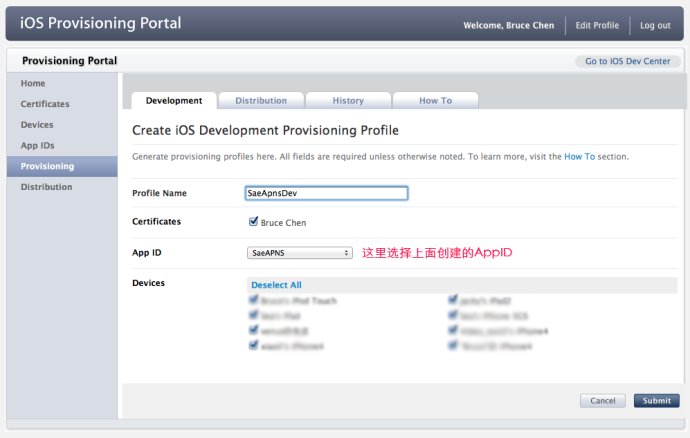
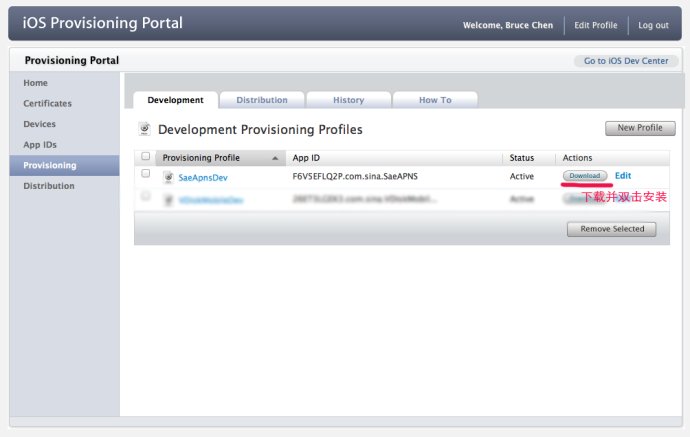
5, 生成并安装Profile文件:
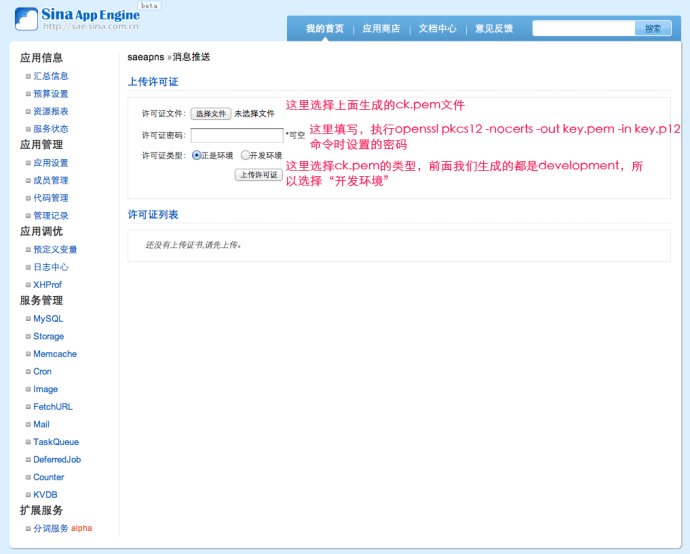
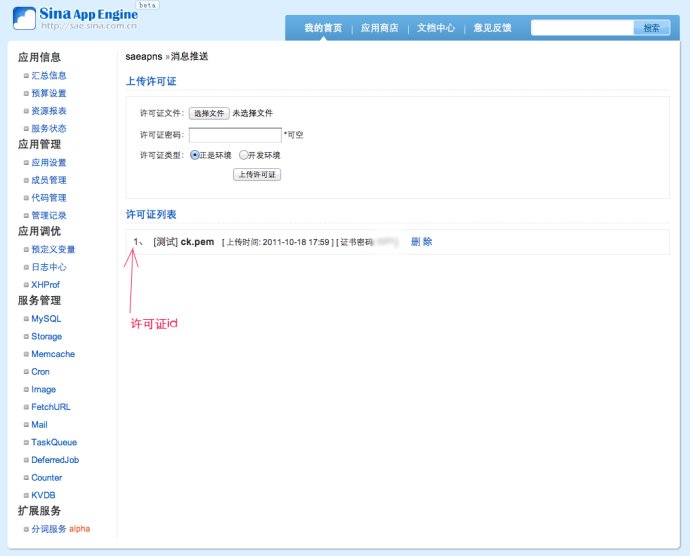
6, 上传ck.pem到SAE, 如图:
7, 客户端程序:
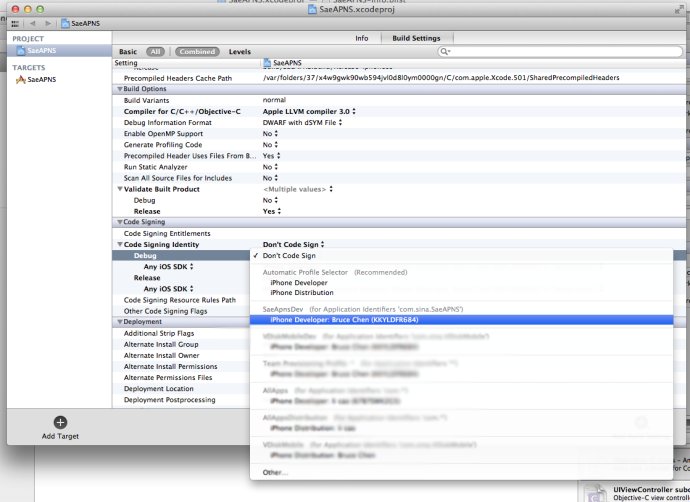
设置profile:
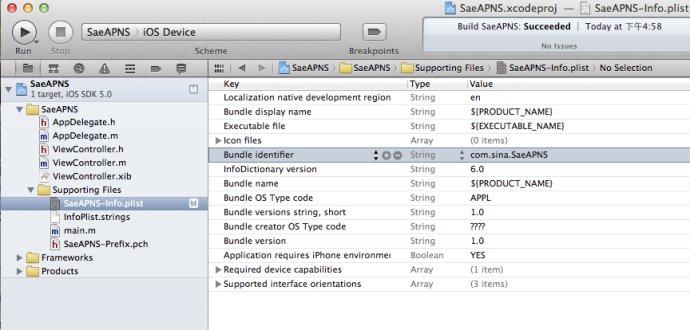
在info.plist中设置Bundle identifier:
在合适的位置加入下面代码,将你的应用注册到消息中心:
-
- (IBAction)action:(id)sender {

    //注册到消息中心:

    [[UIApplication sharedApplication]
     registerForRemoteNotificationTypes:(UIRemoteNotificationTypeBadge |
										 UIRemoteNotificationTypeSound |
										 UIRemoteNotificationTypeAlert |
                                         UIRemoteNotificationTypeNewsstandContentAvailability)];
}
在AppDelegate中加入下面代码:
-
#pragma mark -
#pragma mark APNS

- (void)application:(UIApplication *)application didRegisterForRemoteNotificationsWithDeviceToken:(NSData *)deviceToken {

    //获得 device token
    NSLog(@"deviceToken: %@", deviceToken);


    /*

     . . . . . .

     在这里把deviceToken和用户信息发送到服务器端

     . . . . . .

     */


    //获得 唯一标示
	NSLog(@"uniqueIdentifier: %@", [[UIDevice currentDevice] uniqueIdentifier]);
}

- (void)application:(UIApplication *)application didFailToRegisterForRemoteNotificationsWithError:(NSError *)error {

    NSLog(@"Error in registration. Error: %@", error);
}


- (void)application:(UIApplication *)application didReceiveRemoteNotification:(NSDictionary *)userInfo {

	/*

     收到消息自定义事件

     */

    if ([[userInfo objectForKey:@"aps"] objectForKey:@"alert"] != nil) {

        UIAlertView *alert = [[UIAlertView alloc] initWithTitle:@"通知"
                                                        message:[[userInfo objectForKey:@"aps"] objectForKey:@"alert"]
                                                       delegate:self
                                              cancelButtonTitle:@"确定"
                                              otherButtonTitles:nil];
        [alert show];
        [alert release];
    }
}
8, 服务器端程序:
-
/**
 *
 * 实例代码
 *
 * SaeAPNS调用方法详见API文档:http://apidoc.sinaapp.com/sae/SaeAPNS.html
 *
 * @author Bruce Chen
 *
 */

header("Content-Type: text/html;charset=utf-8");

include_once("saeapns.class.php");


/* int $cert_id  许可证序号(1-10)*/
$cert_id = 1;

/* string $device_token 设备令牌 */
$device_token = 'xxxxxxxx xxxxxxxx xxxxxxxx xxxxxxxx xxxxxxxx xxxxxxxx xxxxxxxx xxxxxxxx';

/* string $message 消息内容 */
$message = date('Y-m-d H:i:s') . ": \n" . '测试消息 from SAE';


/*

array $body 消息体(包括消息、提醒声音等等),格式请参考示例和{@link http://developer.apple.com/library/ios/#documentation/NetworkingInternet/Conceptual/RemoteNotificationsPG/ApplePushService/ApplePushService.html#//apple_ref/doc/uid/TP40008194-CH100-SW1 Apple官方文档}

*/

$body = array(

	'aps' => array('alert' => $message, 'badge' => 1, 'sound' => 'in.caf'),
	'others' => array()
);

//实例化SaeAPNS

$apns = new SaeAPNS();

//推送消息

$result = $apns->push($cert_id, $body, $device_token);

if ($result !== false) {

	echo '发送成功';

} else {

	echo '发送失败';
	var_dump($apns->errno(), $apns->errmsg());
}